Salt Finds the Seams First: A Five-Point Winter Audit for Blackpool Cars

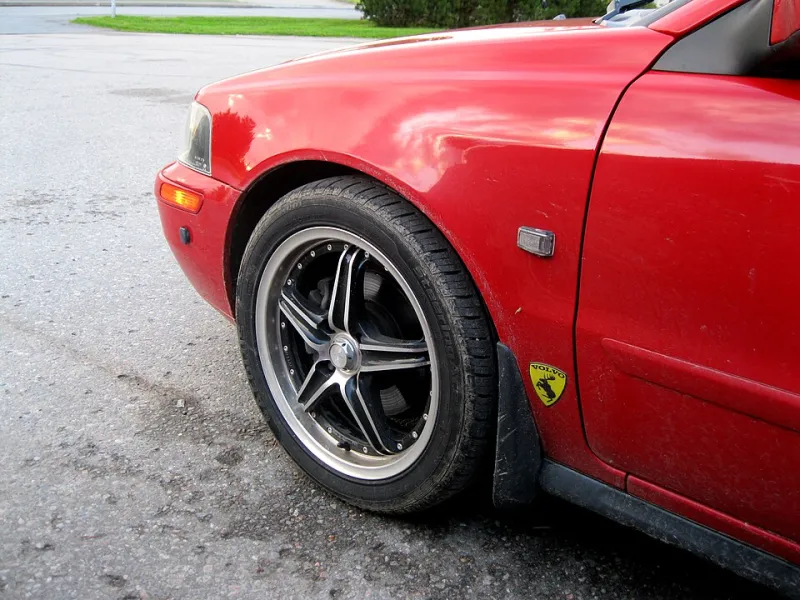
Photo: Shixart1985, CC BY 2.0, via Wikimedia Commons
There's a particular kind of morning in Blackpool where the prom looks beautiful and the roads look like someone's emptied a bag of gravel over them. You drive home from Bispham or up from Squires Gate, the car looks broadly fine, and you park up feeling like you've got away with it. You probably haven't. Salt doesn't attack the panel you can see in the streetlight. It settles in the edges, dries overnight, and quietly gets on with it.
This isn't a doom piece. It's a walk-around. Five spots, ten minutes, and a routine you can repeat after any properly gritty drive between now and spring.
Why the edges matter more than the panels
A flat door skin gets rinsed by rain, wiped by your sleeve, seen by you every day. A door shut gets none of that. It sits there holding a thin film of salty water, sheltered from the weather that would otherwise wash it away, and every time you open and close the door it gets a fresh dose.
That's the pattern across all five spots below: sheltered, forgotten, and repeatedly re-wetted. Paint fails at edges first anyway — it's thinner there, and there's nothing behind it to blunt the corrosion once it starts.
One: the door shuts and hinge pockets
Open every door fully and look at the vertical strip where the door meets the body. Then look at the bottom corner, near the hinge, where the drain sits. On a car that's done a coastal winter, you'll usually see a pale, chalky tidemark — dried salt — sitting on the seam sealer. Left long enough, it turns into a bloom under the paint and then into something you can feel with a fingernail.
What to do: a soft detailing brush and a weak mix of pH-neutral shampoo, worked along the shut from top to bottom, then flushed with clean water from a spray bottle rather than a hose. You're not trying to soak the interior trim; you're trying to move salt out of a channel and rinse it away. Dry with a microfibre, then wipe the painted surfaces with a spray sealant.
Two: the sill seams
Crouch down and look along the welded lip that runs under the doors, where the sill folds back on itself. Grit thrown up by the front wheels lands here, and because the lip traps it, it stays damp. This is the single most under-watched rust site on a ten-year-old UK car.
Run a finger along it (yes, really). If it feels rough or grainy, that's grit sitting against paint. Flush it with water, agitate gently with a brush, flush again, then dry. On older cars, a bit of cavity wax or a proper seam sealer applied by a specialist is money well spent — but only on clean, dry metal. Waxing over salt is just wrapping it up.
Three: the fuel filler surround
Easily missed because you only see it once a fortnight. The recess around the filler neck collects road spray, and on older cars the drain hole at the bottom blocks with grit and leaf litter. Water sits, salt concentrates, and you get bubbling around the arch on the fuel side — a classic Fylde coast complaint.
Clear the drain with a cable tie or a blast of air, rinse the recess, dry it properly, and give the painted ring a coat of spray sealant. Two minutes, once a month.
Four: the boot lip and seal channel
The rubber seal around the boot isn't the problem; the painted channel underneath it is. Lift the seal gently at the corners and at the bottom edge near the catch. If there's grit or damp sand in there, it's been grinding against paint every time you've closed the boot.
Rinse, dry with a towel folded into a point, and leave the seal to sit back naturally. Don't dress the rubber until the channel underneath is dry, or you'll trap moisture where you can't see it.
Five: wheel arch edges and the liner lip
Where the arch liner meets the wing, there's a lip that holds a fine paste of grit and salt. Look for a pale line following the arch curve. Flush from above and behind, not straight at it, so you push the grit out rather than driving it deeper. A dedicated arch brush earns its keep here.
While you're in there, check the inner lip of the alloy for brake dust that's bonded on — that's a separate job, but the same principle: edges hold what flat surfaces shed.
The ten-minute post-drive routine
- Rinse, don't scrub. A pump sprayer of clean water, worked into the five spots, moves most of the salt before you touch anything. Scrubbing dry salt is sandpaper.
- Dry the edges. A plush microfibre, folded to a point, into every shut and channel. Damp salt left to evaporate is worse than the drive itself.
- Protect the paint. A spray sealant or quick detailer on the painted surfaces inside the shuts. It won't last like a ceramic coating, but it gives salt something to sit on other than paint.
- Once a month in winter, do the fuel recess and boot channel properly rather than just a rinse.
What good looks like
Before: a chalky white line along the sill lip, gritty to the touch, and a faint bloom at the bottom of the rear door shut.
After a proper flush-and-dry: the lip is smooth, the paint has colour rather than haze, and the shut smells of nothing at all. That last bit matters — the damp, salty smell in a door shut is the early warning that water is sitting where it shouldn't.
When to hand it over
If you find bubbling paint, a soft spot in the sill, or rust creeping out from under seam sealer, stop washing and get it looked at. That's bodywork, not valeting, and a Blackpool winter won't give you a second chance to catch it early.
For everyone else: ten minutes after the gritter's been out, five edges, one towel. That's the whole trick. Do it now, while the salt is still sitting on top of the paint rather than in it.